
Using the Secure Enclave to improve the integrity of iOS apps

September 23, 2024
What is Secure Enclave?
Para definir qué es el Secure Enclave, vamos a hacer una analogía. Supongamos que tenemos una casa y dentro tenemos una caja fuerte supersegura y especial:
-
The house represents your device. Inside your house you have many rooms where you store things (apps, photos, messages, contacts...) and anyone who has the house key can enter and have access to all these things.
-
The safe is the Secure Enclave. The safe is inside the house, but you need special access to get inside, so it is completely isolated from your house. Suppose you have certain belongings such as jewelry or documents that you consider very important and that you do not want anyone without permission to have access to them. These will be safe in the safe.
-
The jewelry or documents you keep in your safe would be biometric data (Face ID, Touch ID), cryptographic keys...
-
To open the safe you have to go through a very rigorous process (via Face ID or Touch ID). Every time you try to open the safe, the safe very meticulously verifies that it is you who is opening it. If the opening process is successful, the safe allows access to your valuables for a few moments, but never allows you to take them out of the safe. The whole process takes place inside the safe and no one knows what happens inside (encryption and decryption, signatures...).
-
The safe is very secure. Even if someone managed to get into your house, they would have access to all your stuff except the safe. If an attempt was made to break in, the safe would be locked and would not allow any access.
In short, the Secure Enclave is a safe inside the device that ensures that only you have access to your most valuable data (such as your biometric data) as well as helping to perform certain cryptographic operations by adding more security to them.
Now, let's define Secure Enclave in a slightly more technical way:
It is a security subsystem that is integrated into the SoCs of most Apple devices. Specifically it is available for:
-
iPhone 5s or later
-
iPad Air or later
-
MacBook Pro computers with Touch Bar (2016 and 2017) with Apple's T1 chip
-
Intel-based Mac computers with Apple's T2 security chip
-
Mac computers with Apple chip
-
Apple TV HD or later
-
Apple Watch Series 1 or later
-
HomePod and HomePod mini
The Secure Enclave is isolated from the main processor, which gives it an additional layer of security - if the main processor is compromised, the Secure Enclave maintains its integrity. It has its own boot ROM with which it establishes a hardware root of trust (via UID and GID) and an AES engine for secure cryptographic operations. As well as storage independent of that used by the operating system and system applications.
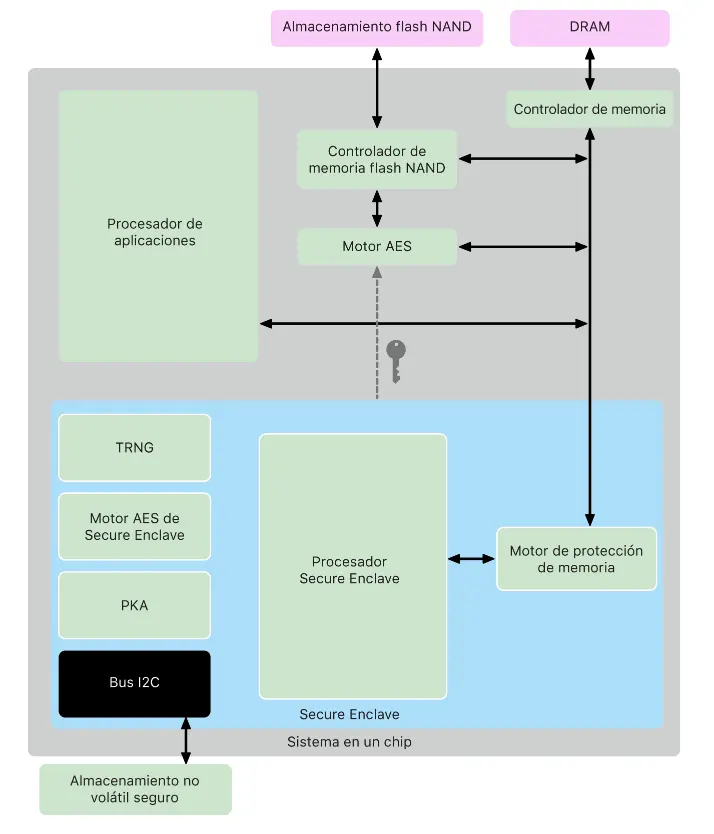 Secure Enclave diagram.
Secure Enclave functionalities
The Secure Enclave has different functionalities that allow the device to be more secure:
-
Memory Protection Engine. The Secure Enclave uses a dedicated area of the device's DRAM memory. This memory protection engine is responsible for encrypting and decrypting the memory used by the Secure Enclave so that only the Secure Enclave can use it.
-
Boot ROM. The Secure Enclave has a dedicated boot ROM, an immutable code that establishes the hardware root of trust for the Secure Enclave. Thanks to the boot monitor the Secure Enclave boot ROM checks the cryptographic hash and signature of the sepOS image (Secure Enclave firmware), if it is correct, it allows it to run on the device. If incorrect, the Secure Enclave cannot be used on the device.
-
True random number generator. We all know how complex it is to generate a sufficiently random number with software/hardware. The Secure Enclave incorporates a random number generator that it uses whenever it generates a cryptographic key. This generator is based on several oscillators in rings post-processed with CTR_DRBG.
-
Root cryptographic keys. The Secure Enclave includes a unique identifier (UID) root cryptographic key, unique for each device. This key is used to protect device-specific secrets.
-
AES engines. Responsible for symmetric cryptographic operations.
-
Public key accelerator. In charge of asymmetric cryptography operations.
-
Secure non-volatile storage. The Secure Enclave is equipped with a dedicated non-volatile storage to which only the Secure Enclave has access. It is used for the storage of private keys, cryptographic engines, random number generators...
-
Secure Neural Engine. In charge of managing Face ID.
As we can see, the Secure Enclave is a processor that is responsible for performing many critical operations for the security of the device. In this article, we are going to focus on the generation and management of public/private keys to ensure the integrity of the device.
Ensuring device integrity
One of the available ways we have to ensure that our application is communicating with the server we want to avoid MITM (Man in the middle) attacks is through SSL Pinning. In this way, we check that we are attacking a server whose certificate is the one we expect.
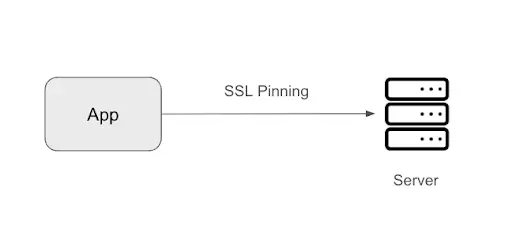 Pinning process.
Suppose now that we are developing a banking application. There may be certain parts of the application that do not require checking that the instance of the application and the device on which it is running is legitimate, such as checking common financing offers for all the public, account types... But there will be a certain point in the application where we want the user to be able to access their banking details, movements, make transfers... Up to this point, we have ensured that the application is communicating with the correct server using SSL Pinning. But what if our server wants to make sure that it is communicating with a secure device as well as that the application instance is legitimate? For this we will use the App Attest Service.
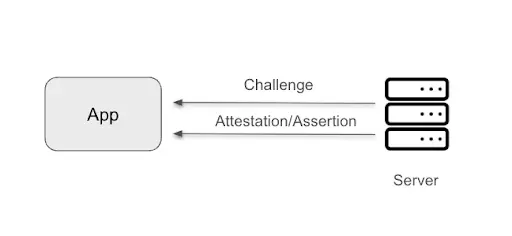 Attestation/Assertion process.
The solution provided by Apple for this problem is, using the Secure Enclave, to create a public-private key pair certified by Apple ensuring that the keys come from a legitimate instance of the application. We can then make use of this Apple-certified key pair to sign future requests to our backend ensuring that it is communicating with a legitimate instance of the application.
And the question we are all asking ourselves is, how does Apple know if this key pair has been generated from the Secure Enclave? After several tests, if we try to verify a key pair that has been generated from a source other than the Secure Enclave, Apple's App Attest service returns an error. This is because Apple includes a private key within the Secure Enclave that is linked to Apple's PKI infrastructure. So when Apple's servers receive the key pair, they verify that the keys have been generated and signed with a trusted certificate (itself signed by the private key preconfigured in the Secure Enclave) within Apple's PKI.
In order to use this application integrity verification, the following requirements must be met:
-
The application will only be compatible with devices that have the Secure Enclave (iPhone 5s or higher).
-
iOS 14 or higher is required.
-
To use the App Attest service, it is necessary to have an App ID registered on the Apple developer portal.
Check disponibility
Before using the App Attest service, we must import the DeviceCheck library and check that it is available on the current device. To do this:
var isSupported: Bool { get }
Key generation and use of keys
The App Attest service consists of generating a public-private key pair (EC P-256 format) using the Secure Enclave and validating it against Apple. From this moment on, all the requests we make to the server can be signed with this key so that the server can guarantee the integrity of the application.
It is important to note that the keys generated in the Secure Enclave never leave the Secure Enclave. When a key pair is generated, the private key is stored in the Secure Enclave and cannot be extracted from it. For security, neither the application nor the system knows the generated key.
To generate the hardware-based key pair we will use the method:
func generateKey(completionHandler: @escaping (String?, (any Error)?) -> Void)
It should be noted that all the methods we are going to use are also available asynchronously through async/await.
This method returns a key identifier that we will use later to perform operations with the generated keys or an error if there has been a problem. It is important to store this key identifier in a persistent way (either in Keychain, or in the server), since as previously mentioned, we cannot recover the keys generated in the Secure Enclave and the only way we have to operate with them is by means of this identifier.
If at any time we lose the identifier, we will have to generate a new key pair and repeat the whole key verification process against Apple.
If our application allows us to operate with different users, it is advisable to generate a pair of keys for each user. This way, it is easier to identify possible later frauds if the requests are signed with different keys.
Certify the key pair as valid
Once the key pair has been generated, we must verify that they have been generated from an application and device that are not compromised. To do so, this key pair will be certified against Apple.
It is important to note that this is the only time that Apple's servers intervene in the App Attest. Once the key pair has been verified against Apple, the next requests we make to the server will be signed locally using the private key that we have verified with Apple. As with all services, we should try not to saturate the attestKey service to avoid unexpected errors. In this case, Apple's documentation recommends that the features that depend on this service be released progressively. The services have a limit of 100 requests per second and per Bundle Identifier, this limit may vary depending on the saturation experienced by Apple services.
When we are going to create a pair of keys and verify them against Apple, it is recommended that the server to which we are going to send the public key to verify the legitimacy of our requests provides us with a unique challenge that is only valid for this verification. In this way, we will avoid replay attacks and ensure that this key pair is only valid for this transaction.
To certify the keys against Apple, we will use the method:
func attestKey(

     \_keyId: String,

     clientDataHash: Data,

     completionHandler: @escaping (Data?, (any Error)?) -> Void

)
The input parameters are:
-
KeyId: The key identifier obtained when generating the key pair.
-
clientDataHash: The SHA256 hash of the challenge issued by the server.
After verifying the keys against Apple, we will have to send this certification to our server with a series of data that they will use to verify later signatures that we make in the requests.
If the execution of the method is successful, it will return an attestationObject which is the Data object. This object has all the information that our server needs to verify that the key pair has been verified correctly as well as the public key needed to verify the signature of subsequent requests. In detail, the fields it contains are:
-
RP ID (32 bytes) - A hash of the App ID formed as follows: concatenation of the team identifier, a dot and the bundleIdentifier of the application.
-
counter (4 bytes) - Value that reports the number of times the application has used the key to sign an assertion (signature of a request).
-
aaguid (16 bytes) - Constant indicating whether the key belongs to the production or development environment.
-
credentialId (32 bytes) - Contains the hash of the public key of the key pair generated in the Secure Enclave.
The simplest way to send all this information to the server is to generate a base64 String from the data received by the attest service and send it to the server. The procedure that the server has to follow to manage these attestations is detailed here.
There are several errors that this method can return. But in particular, if it returns a serverUnavailable, Apple recommends retrying the attest with the same key pair in case there has been a connection error. If on retrying, it still fails, it is recommended to generate a new key pair and try again.
Sign petitions
Once the key pair has been generated and certified by Apple, we can sign any request we are going to make to the server so that the server verifies that the request is coming from a legitimate application.
There is no restriction on the number of assertions that can be made, in fact, it is an operation that is done locally on the device. So we do not need to communicate with Apple's servers again. The decision of which requests to sign is up to each project. It may only be necessary to sign requests with compromised data, when downloading paid content or to access premium content in the application.
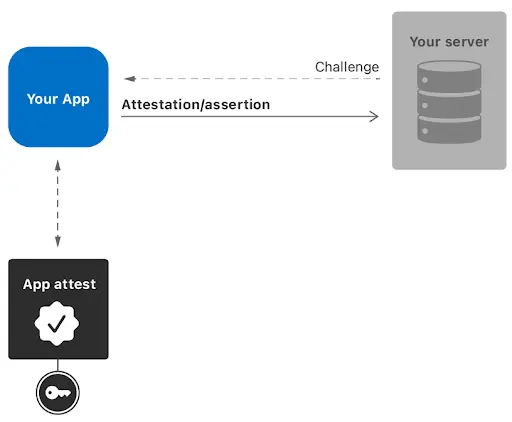 Sign process.
To sign a request, as in previous steps, it is recommended that our server provides us with a challenge to avoid replay attacks. This is intuitive, but it is worth noting that only data that is signed by the assertion can be trusted. If we add headers or any data in the request that is not signed by the assertion the App Attest would not be covering that data.
First, the SHA256 hash of the data to be signed is calculated. Then a Data object is created with the calculated hash:
let challenge = <# Un string que se ha generado desde nuestro servidor>
let request = \[ "action": "getClientDetails", "clientId": "12345", "challenge": challenge \]
guard let clientData = try? JSONEncoder().encode(request) else { return }
let clientDataHash = Data(SHA256.hash(data: clientData))
The signing process consists of passing the clientDataHash (which is the request we are going to make to our server) together with the key identifier to the Secure Enclave so that it signs them with the private key and returns them to us signed.
To sign this data, the method is used:
func generateAssertion(

    \_ keyId: String,

    clientDataHash: Data,

    completionHandler: @escaping (Data?, (any Error)?) -> Void

)
The input parameters are:
-
keyId: Identifier of the pair of keys generated by the Secure Enclave.
-
clientDataHash: Data to sign.
If everything has gone well, it will return an assertionObject where the signature of the data that we will have to pass together with the request (in some header for example) to our server so that it checks the validity of the same one.
The summary of this check by the server is as follows:
-
The server receives the assertionObject along with the flat request that the client is making.
-
The server checks that the data in the assertionObject is correctly signed by the private key associated with the public key it has obtained after verifying the keys against Apple.
-
The server checks that the request data that is signed in the assertionObject matches the in-plane request received.
-
If the content matches, it means that this request has been made legitimately from the device and has not been modified in the course of the client to the server.
-
If the content does not match, it means that the data in the flat request has been modified since the client sent it. Therefore, the server must take action to reject the request.
-
Conclusions
In summary, the App Attest service is a tool that Apple provides us to take advantage of the security of the Secure Enclave. In this article we have seen one of its utilities, but as we have seen in the article, we can use it to implement other security mechanisms such as symmetric cryptography, random number generation... No process in cybersecurity, and particularly in mobile applications, is completely infallible, the key lies in adding as many layers of protection as possible to deter attackers.
The App Attest service, along with other security recommendations, such as those listed by OWASP, allows us to develop secure applications that provide users with peace of mind in an environment where more and more personal data resides on our mobile devices. At SNGULAR, we adopt these and other advanced techniques to ensure that the applications we develop meet the highest security standards.
In later articles, we will introduce a way to perform this same verification of the client against the server on Android devices.
Bibliography
Our latest news
Interested in learning more about how we are constantly adapting to the new digital frontier?

Tech Insight
January 13, 2025
How to bring your application closer to everyone

Tech Insight
December 19, 2024
Contract Testing with Pact - The final cheetsheet

Insight
December 18, 2024
Agility, Complexity and Empirical Method

Tech Insight
December 17, 2024
Google’s new quantum processor is here, but what does it really mean?